FusionPBX Docs
latest
  • Getting Started
  • Home
  • Accounts
  • Dialplans
  • Applications
  • Status
  • Advanced
  • Hardware
    • Auto Provision Phones
      • Yealink
      • Polycom
      • Cisco SPA
      • Fanvil
      • Grandstream
      • Htek
      • Zoiper
    • Manually Provision Phones
    • Firewall Devices
  • Software
  • Additional Information
  • Contributing
  • Documentation Guide
  • Other
FusionPBX Docs
  • Docs »
  • Hardware »
  • Yealink
  • Edit on GitHub

Yealink

To auto provision Yealink

  • Login to the phone
  • Goto the Security tab at the top right
  • On the left vertical menu click Trusted Certificates
  • On the dropdown box near the bottom choose Disabled for “Only Accept Trusted Certificates”. If you have a Certificate that is not self-signed and Approved by Yealink and installed on your FusionPBX server, you can keep this enabled
  • Click Confirm
../../_images/fusionpbx_provision_auto_yealink1.jpg

Once you have that done

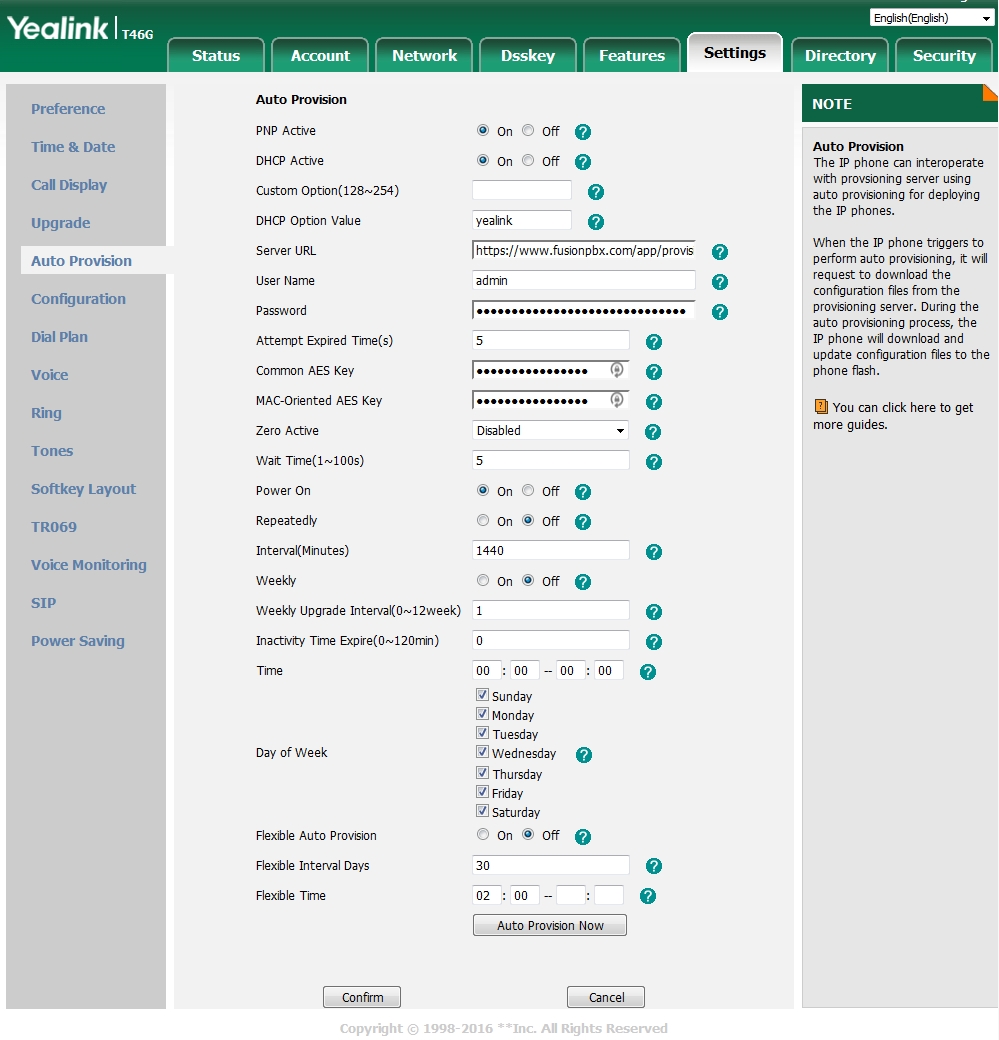
  • Click the Settings tab at the top
  • On the left vertical menu click Auto Provision
  • Fill in the Server URL field. This will be https://domain.tld/app/provision Replace domain.tld with your actual domain name
  • Click Confirm at the bottom
  • Click Auto Provision Now at the bottom
../../_images/fusionpbx_provision_auto_yealink.jpg
Next Previous

© Copyright 2008-2019, Mark J Crane Revision c0aa8bb2.

Built with Sphinx using a theme provided by Read the Docs.
Read the Docs v: latest
Versions
latest
Downloads
pdf
htmlzip
epub
On Read the Docs
Project Home
Builds

Free document hosting provided by Read the Docs.